
A refrigerator is a cornerstone of every kitchen, diligently working to keep our food fresh and beverages cool.
However, like any other appliance, it requires regular maintenance to ensure optimal performance.
One common issue that can arise is trouble with the refrigerator compressor.
In this step-by-step guide, we’ll walk you through the process of maintaining and repairing your refrigerator compressor, helping you troubleshoot and resolve issues efficiently.
Step 1: Safety First
Begin by ensuring your safety.
Unplug the refrigerator from the power source to eliminate the risk of electric shock during the maintenance process.
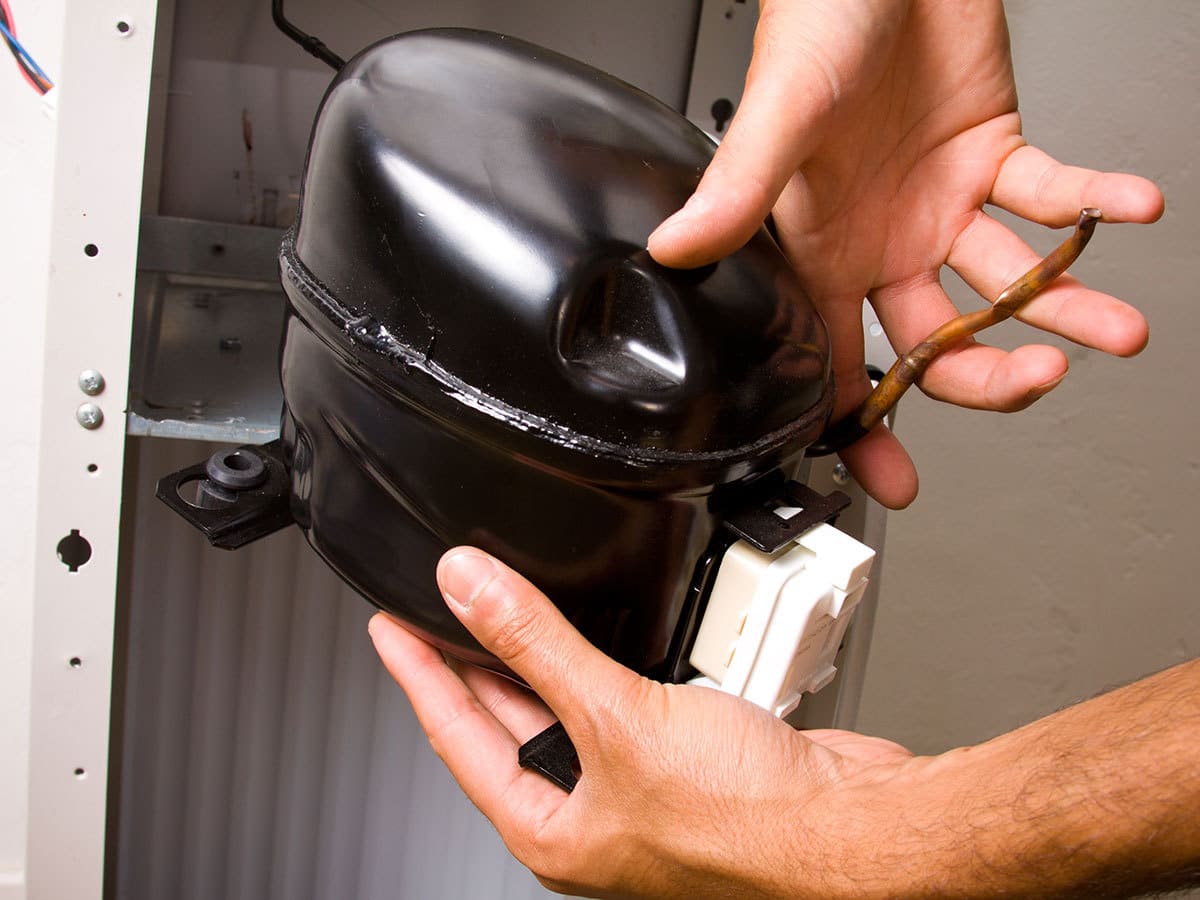
Step 2: Identify the Compressor Location
Locate the compressor, typically positioned at the rear of the refrigerator.
Recognize this sealed unit housing the motor and pump, connected to the condenser coil.
Understanding its location is crucial for effective troubleshooting.
Step 3: Clean the Surrounding Area
Promote proper airflow by clearing the area around the compressor.
Use a vacuum cleaner or a brush to remove accumulated dust, cobwebs, or debris.
This debris can compromise the compressor’s efficiency, making regular cleaning a preventive measure.
Step 4: Check for Leaks
Carefully examine the compressor for refrigerant leaks, indicated by oily residue.
If leaks are present, consult a professional technician promptly to assess and repair the issue, as handling refrigerants requires expertise.
Step 5: Examine the Start Relay and Capacitor
Inspect the start relay and capacitor for signs of damage, burning, or discoloration.
These components assist the compressor during startup.
Replace them if necessary, using parts recommended by the refrigerator manufacturer to maintain compatibility.
Step 6: Listen for Unusual Noises
Power up the refrigerator and keenly listen for abnormal sounds emanating from the compressor.
A clicking noise may signal a faulty relay, while a buzzing sound could indicate issues with the compressor motor.
Identifying specific noises aids in precise diagnosis.
Step 7: Test the Compressor Windings
Use a multimeter to check the compressor windings for continuity.
Refer to your refrigerator’s manual for recommended resistance values.
Readings falling outside the specified range may indicate a problem with the compressor motor, necessitating replacement.
Step 8: Seek Professional Assistance if Needed
If issues persist or if you are uncertain about the diagnosis, it’s prudent to consult a professional refrigerator repair technician.
These experts possess the necessary expertise and tools for addressing complex compressor problems, ensuring a thorough and accurate resolution.
Conclusion:
Regular maintenance of your refrigerator, with a specific focus on the compressor, is pivotal for sustained functionality.
By diligently following these detailed steps, you can identify, troubleshoot, and address common issues, potentially extending the lifespan of your refrigerator.
When in doubt, seeking professional assistance ensures the longevity of your appliance and the freshness of its contents.